Abstract:
Ansys Mechanical provides a Python scripting environment that allows one to automate feature control and result collection within the ANSYS Mechanical environment. Before a script can be finalized, research must be conducted to identify key information and references to include. This document explores typical methods for exploring the Model Tree in Python within ANSYS Mechanical and generates scripts to run analyses and output results.
Getting Started: Exploring the Model Tree
When trying to identify objects that already exist in a model, we usually perform a series of manual searches until we find what we are looking for, then codify the steps that will repeatedly “find” what we need for future models. This is like being in the dark and trying to feel our way along until we can illuminate the terrain and create a mental picture of our surroundings.
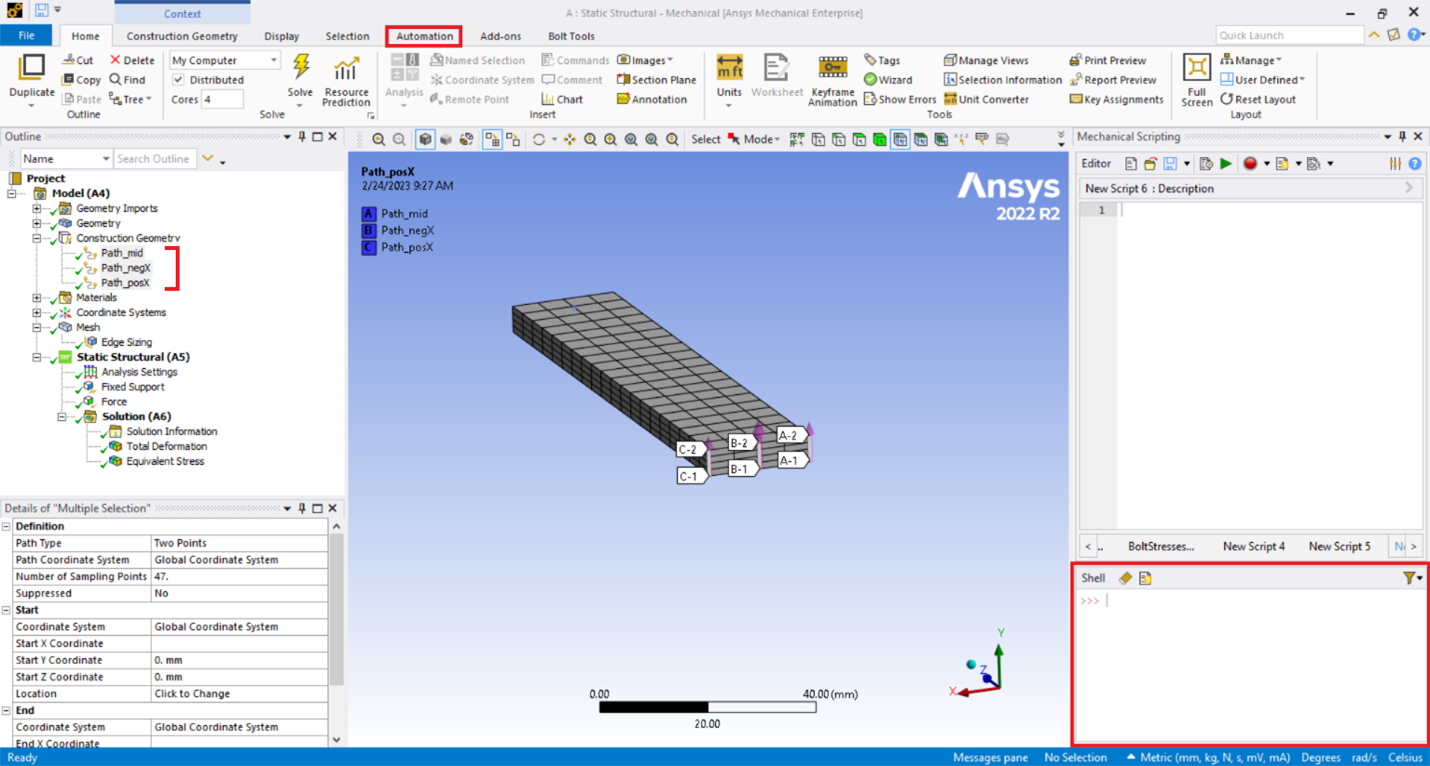
In the image below, I have a cantilever beam with three previously defined path objects. I access the “Automation” tab and begin typing queries into the “Shell” scripting pane.
First, I type something basic to learn what is in the model:

Here, “Model” is my model. When I type the first dot “.” after “Model”, a menu of potential choices appears at my cursor in the shell. I will choose to count how many children are in my model. The answer for this example is “8”. Next, I want to learn the names of these different children.
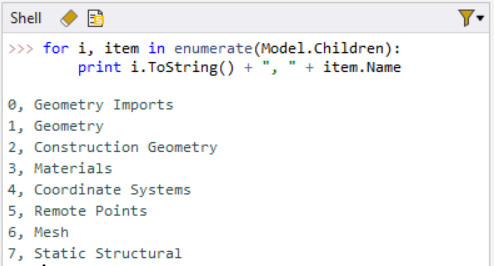
Please note that when joining the name and the increment number to be printed as text, I needed to convert the increment number, “i”, to a string.
In this example, I created a function that prints the name of each of the 8 children in my model. I see that “Construction Geometry” is the third listed item and is therefore the 3rd child of “Model”. One can have multiple lines in a command by choosing the keys simultaneously while at the end of the first line.
I will verify that the 3rd child is associated with “Construction Geometry”.

See how I defined “2” to represent the 3rd child? This is because the first increment in Python starts from “0”. Python will provide more choices if I assign “Model. Children[2]” to its own object. Let me assign this 3rd child to “cg” (a name of my own choice), then see how many children this construction geometry object has.
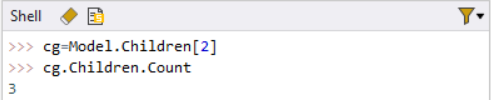
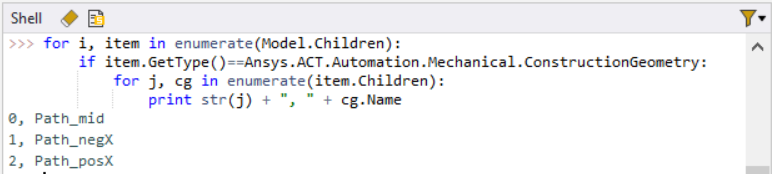
There are three children in this construction geometry object. Let’s learn what their names are:
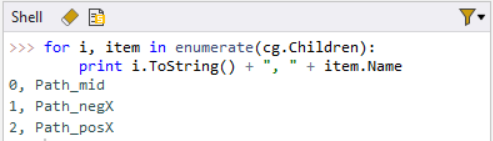
In this series of commands, I identified the “child” under my “Model” that is a “Construction Geometry”, then learned which “Children” exist under that “Construction Geometry”. We did this manually, requiring us to query, view the results, and then make decisions based on what we saw. We could automate this same search, but we will need to be specific about how we search.
Automating the Search with Object Types
For example, if I wanted to write a script to return the item numbers and names of any paths in my model, I would need to look through everything in my “Model” and act on only those items that are of a “Construction Geometry” type. To complicate this further, I probably don’t want to filter by the name “Construction Geometry”, simply because ANSYS Mechanical allows the user to rename these Model Tree folders to a name of one’s choosing. Therefore, I need to identify the “Type” of object “Construction Geometry” is, then filter on that “Type”.

Here, we see the “Type” for “Construction Geometry” is:
Ansys.ACT.Automation.Mechanical.ConstructionGeometry
Now, I don’t need to know which object is construction geometry, or its current name. I will take action only when this type matches the current object.
(Note that “str(j)” is equivalent to “j.ToString()”, as was used in previous examples)
Solving the Model with Python
Moving on, we can explore how to solve our current analysis, then export a specific result to a text file.
If I want to solve the first analysis in my model, I can type the following:
Model.Analyses[0].Solve()
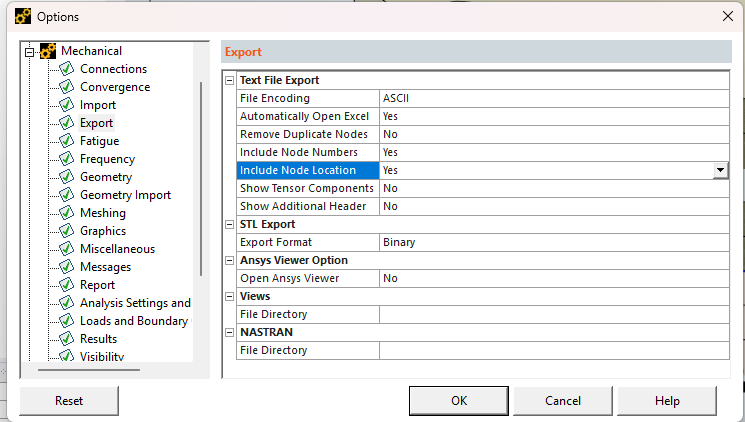
Exporting Results to a Text File
ANSYS doesn’t export directly to Excel; instead, you can export a text file, in the same way as you could right-click on a stress linearization results object in the Model Tree.
If we assume the stress linearization object has already been defined, the next step is to access the solution from the first analysis (in my example).
sol=Model.Analyses[0].Solution
Next, list the children in that solution.

In my example, I only have three results: “Total Deformation”, “Equivalent Stress”, and “Linearized Equivalent Stress”. I will assign this linearized stress to its own object so that I can get more Python command options.
linres=sol.Children[3]
I will first verify that I have defined the object correctly.

Now I will export a text file of all the results.
linres.ExportToTextFile(“D:Work_OzenLinearizedStress.txt”)
Obviously, I have listed the path on my computer to where I wanted this file saved… your path is likely to be different.
Building a Reusable Automated Script
If we know we want to export linearized equivalent stress results, we can use the methods previously described to write a script to do so, regardless of the name or number of objects in our model.

First, we find the “Type” of results object we want to take action on. In this case, the type is:
Ansys.ACT.Automation.Mechanical.Results.LinearizedStressResults.LinearizedEquivalentStress
Therefore, we can write the following script:

Here, we check the “Type” associated with each child in the solution. If that type matches the “…LinearizedEquivalentStress” type, then we gather location information and generate a file unique file name that includes the name of our results object and the construction object path name. We then export the text data to a TXT file and finally print the name of the file we just generated to the console.
Generating the Final Script in the Editor
All of this was done in the Shell, but if we wanted to make all of this into a script, it would appear as follows within the Editor:
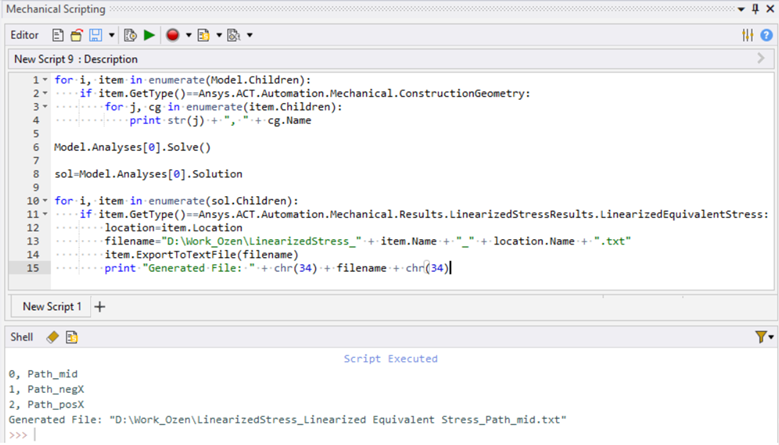
From the Editor, one can save or open any Python script and then run that script in the existing model. Any “print” command appears in the Shell.
Conclusion
Now, I have provided the step-by-step process I would use to try to accomplish these tasks. At each step, I am making mistakes, searching after setting something to its own object name, and typing a “.” to see what menu items appear, and making choices. In other words, trial-and-error. You, too, will need to rely on trial-and-error as you progress with your coding.
Code Snippet:
|
Want to take your Ansys Mechanical scripting further? SimuTech Group offers Ansys training and mentoring to help you build automation workflows. For more Python scripting techniques, see our companion post on using Python to export tabular data from Ansys Mechanical. Contact us to discuss your scripting and automation needs.