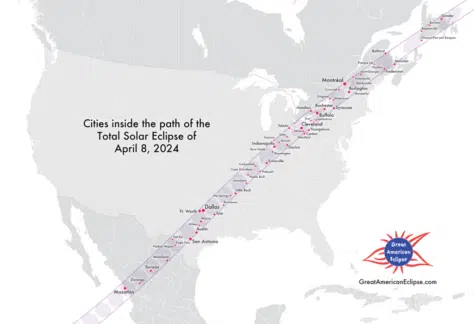
A total solar eclipse is occurring on April 8, 2024, and SimuTech Headquarters is in the path of totality. The last time Rochester was in the path of totality was January 24, 1925 (99 years ago!).
In a total solar eclipse, the Moon covers the bright disk of the Sun completely for a short amount of time. This differs from a partial solar eclipse where only part of the Sun is blocked by the Moon. A total solar eclipse is a rare and important event for any stargazer, and this year Rochester, NY is expected to be in the path of totality for over 3 minutes and 30 seconds!
With the Total Solar Eclipse approaching, it’s important to have a plan to safely view the eclipse. Looking directly into the Sun is never a good idea. To prevent eye damage, look through a filter or “glasses” made specifically for solar viewing. Don’t have access to such eyewear? You might consider an alternative method, a pinhole camera, which projects the Sun’s image onto a surface for safe viewing.
Pinhole Cameras for Viewing the Solar Eclipse
A pinhole camera is a simple type of camera that relies on a tiny aperture – the “pinhole” – instead of traditional lenses to create an image. When light from the scene passes through the pinhole, it projects an inverted image onto the opposite side.
Creating a pinhole camera involves a few basic steps. First, you’ll need to make a small hole in an otherwise opaque material. Then, position a sheet of white paper on the other side of the pinhole, opposite the object you want to view. To enhance visibility, consider shielding the viewing area from external light sources. For more detailed instructions, you can refer to this guide: How to make a pinhole camera for the 2024 eclipse.
To gain a better understanding of pinhole cameras, we can explore them within an Ansys Speos model.
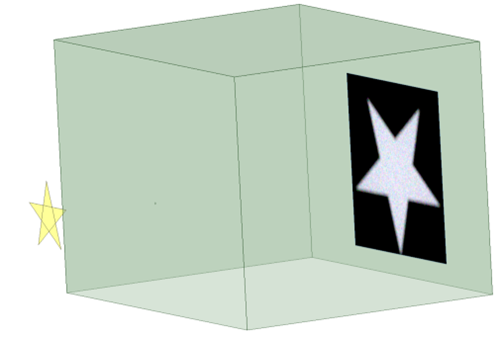
Understanding Pinhole Cameras
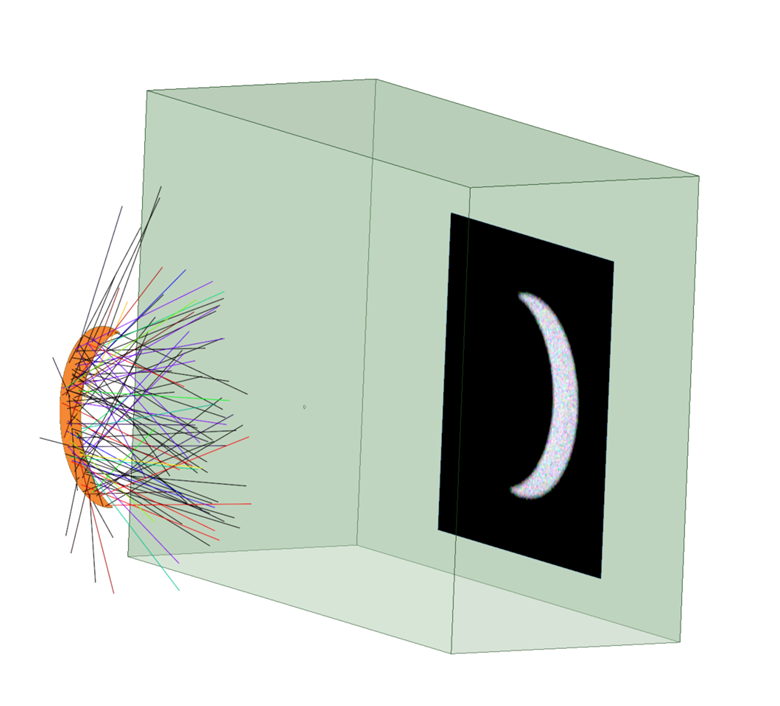
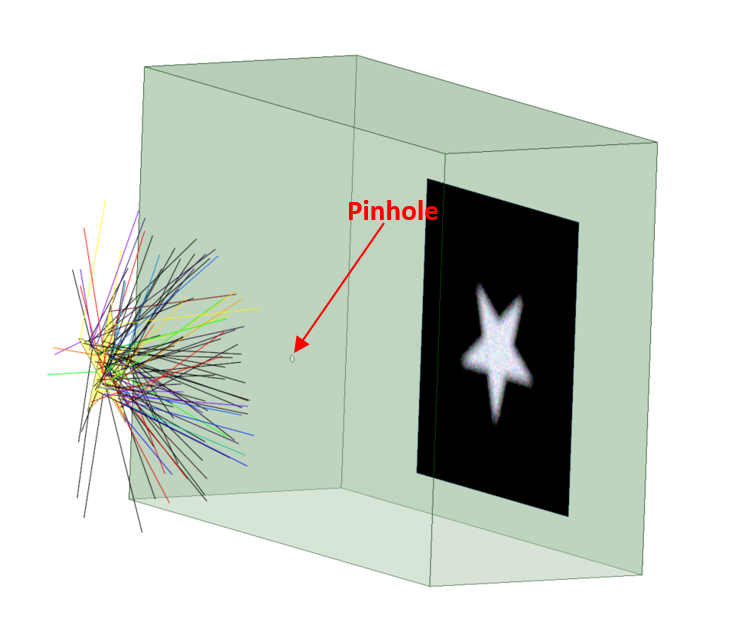
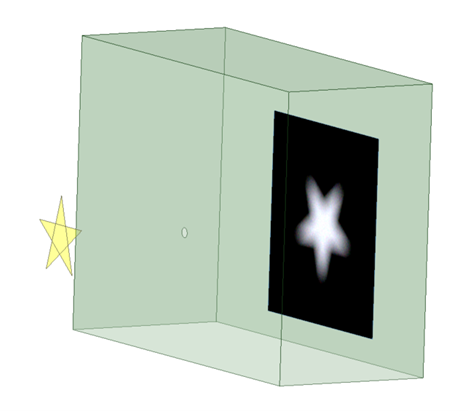
In this Ansys Speos model, we have a star emitting light in all directions representing our sun. We then have a box, with a tiny pinhole cut out of it. Positioned on the far wall of the box is a sensor, allowing us to observe the resulting image.
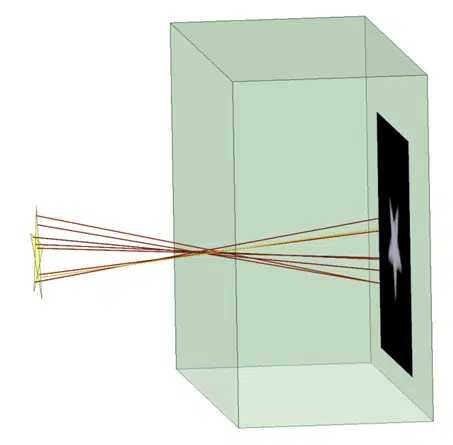
One of the first things we notice about our image is that the star is flipped. Using the Light Path Finder tool, we can see that the light from the top of the star ends up at the bottom of the image, and vice versa.
Now, let’s see what would happen if the pinhole was 10x larger. The larger pinhole results in a brighter, but blurrier image. We can start to understand how if we let the hole get too big, we won’t be able to form an image at all! On the other hand, if the pinhole is too small, the image might be too dim to see. These are important to keep in mind for at-home construction.
What if we change the distance from the pinhole to the screen? We can see that the image of the star grows larger. So, for easier viewing, increasing the distance between the pinhole and image screen can help.
Lastly, let’s investigate what would happen if the pinhole wasn’t a circle. In this model, we tried a square pinhole. We can see multiple images of the star are created and slightly offset, making the edges harder to see.

From modeling, we have demonstrated how different configurations affect the image created by a pinhole camera.
To recap, for a sharp image the pinhole should be small and round. For a larger image, increase the distance between the pinhole and the viewing screen. Happy, and safe, eclipse viewing!
About the Author

Lauren Scheg
Optical Staff Engineer
Lauren specializes in optical system design, illumination systems, and biomedical applications.